Monday, December 20, 2010

English Toffee

Yikes! Sorry it's been so long since I posted! The Christmas season is catching up with me, and things have been busy! I'm officially done with my Christmas shopping, thanks to a couple long days in town. Our tree is up with lights on it, and we'll be decorating it tomorrow. I even got my hair cut! (thank goodness!).

Before I start in on this wonderful recipe, I wanted to let you guys know that for the next couple/few weeks, until everything calms down, I may only be doing one or two posts a week. So don't worry, I'm not ditching you, I'm just going to focus on enjoying friends and family for the holidays!

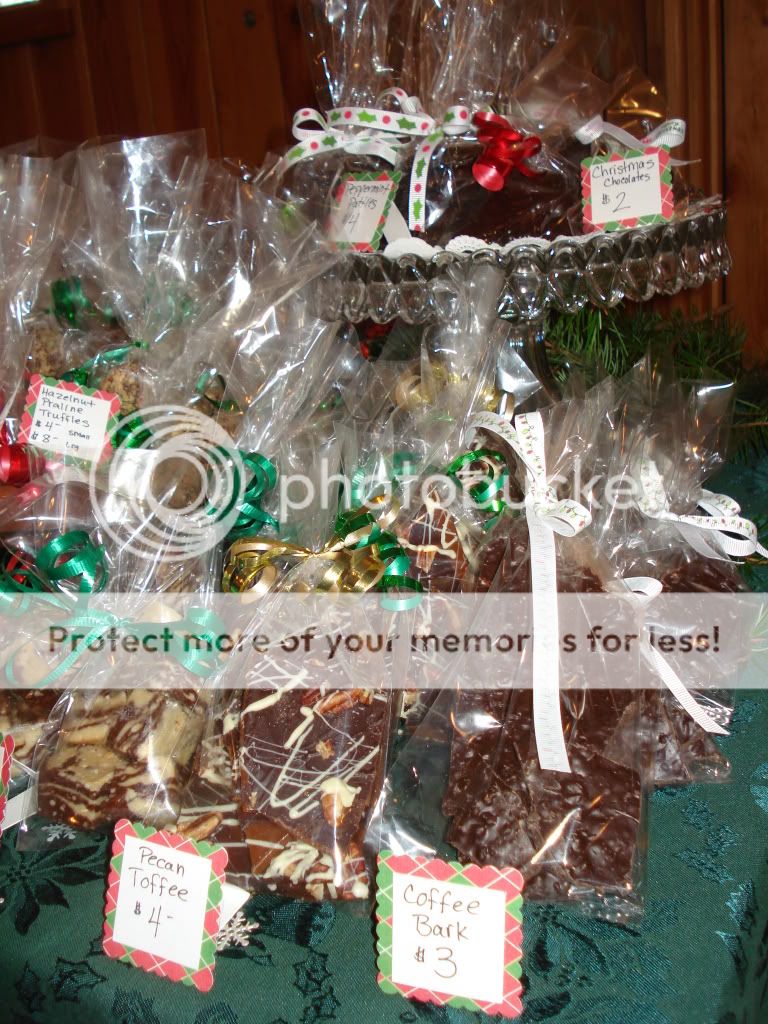
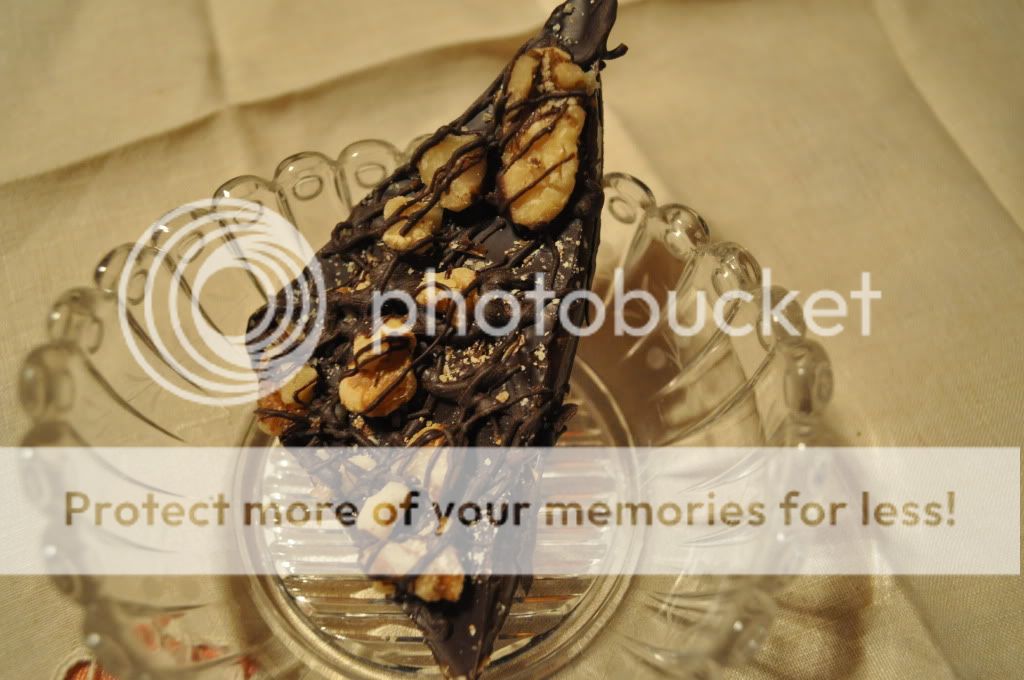
Now, on to the important stuff! I have to tell you, this is one of my favorite candies! My husband loves it too. There is nothing like a crunchy, chocolate & nut covered hunk of buttery toffee to let you know it's a special occasion! It sold really well at the craft fair too! Here is the recipe we were given in school, written by our instructor, Cathy Burgett. Make sure you use a large enough pot for this recipe. The boiling sugar will grow quite a bit, especially when you add the cream and butter. Be careful it doesn't overflow!

English Toffee
1 3/4 lb. sugar
water to cover
1/4 tsp cream of tartar
1 cup cream
1/2 Tbs. vanilla
8 oz. butter

12 oz. chocolate, tempered
1 cup chopped walnuts (4 1/2 oz.)

-Bring the sugar, water and cream of tartar to a boil.

-Cook until it reaches a light caramel color. Add the cream and butter.

-Continue cooking, stirring constantly until the mixture reaches the hard crack stage, 295*.

-Pour out onto a well-oiled, warmed full-sheet pan (I used 2 half sheet pans and silpats) and spread evenly and slowly with a pastry spatula. Spread it about 1/8" thick.

-If the candy begins to harden before it can be spread evenly, place the sheet pan of candy in the oven for a few minutes to warm and soften. Allow the candy to harden at room temperature.

-Gently disengage the sheet of candy from the sheet pan. Spread the top of the toffee with a thin layer of tempered dark chocolate and immediately sprinkle on the ground walnuts so that they stick to the chocolate while it is wet.

-Chill 5 minutes, then flip the sheet of toffee over and repeat the spreading of the chocolate and walnuts. Chill again briefly before breaking up.

-Store in a cool dry place, in a tin, or a nonporous plastic container.

This stuff looks so decadent! There is so much going on in it, you only need a little piece of it to satisfy a sweet tooth. Friends and family will love to munch on this throughout the holiday season, or for any special occasion that comes up!

Hope you all are surrounded with friends and family, and have a merry Christmas! Make sure to eat your candy (and share it too)! ;)

Tuesday, December 14, 2010

Cream Cheese Pastry Dough for Parties! (or whenever)

Hi everybody! How was your day? I spent mine cleaning and organizing everything I took to/made for the craft fair, I hung ornaments on one of the trees on our property out by the road, and I helped Ben with a bonfire that actually ended up failing. Too wet and windy! I mucked about with him in the mud, wearing my green rain boots though, and that was fun. Christmas cards are finally ready to be sent tomorrow, and I've got a full day of work ahead of me! Lots more Christmas stuff to do at the bakery!

I know this is the time when all of those holiday parties start piling up. Lots of pot lucks, family and work gatherings, and people over at your house. Here is an incredibly easy recipe that always impresses, and tastes great! There are lots of variations too, so you can use whatever you've got in your kitchen! That's right, I'm talking about cream cheese pastry dough. You can use it for sweet or savory things! Here it is, just in time!

Cream Cheese Pastry ( by Cathy Burgett)
1 1/2 cups flour
4 oz cold butter, cut into 1-inch pieces
8 oz credam cheese, cut into 1-inch pieces

-In the bowl of a food processor, combine the flour, butter, and cream cheese. (you can add a few spoonfulls of things like citrus zest, pesto, cheese, herbs etc. at this point. I used cilantro pesto)

-Pulse until the mixture forms a ball.

-Wrap and flatten into a disc. Chill the dough for 10 minutes.

-On a lightly floured surface, tap and roll the dough out to a 1/8 inch thickness.

-Cut 3-inch circles from the pastry. (I used a square cutter, whatever you have around works)

-Pat the circles into small muffin tins. (I put papers in first, just to be sure nothing would stick.)

-Chill the dough for at least 10 minutes in the freezer before filling and baking.

-When ready to bake, preheat the oven to 375*, fill each lined muffin tin with a sweet filling, or a savory filling.

-Bake the tartelettes for 25 to 35 minutes until the pastry is golden and crisp.

Alternatively:
-Roll out the dough on a lightly floured board to about 1/8 inch thickness.
-Cut 3 inch rounds.
-Brush each round lightly with egg glaze.
-Fill each round with half teaspoon of a cooked and cooled sweet or savory mixture and fold in half, crimping the edges with a fork.
-Prick the top of each turnover.
-Chill the turnovers for a least 10 minutes in the freezer.
-When ready to bake, preheat the oven to 425*.
-Bake the turnovers on a parchment lined baking sheet for 15-20 minutes until golden brown and crisp.

You can make all kinds of fillings!
Sweet:
Lemon/lime/orange curd
pastry cream
mousse
pudding
pie filling

Savory:
cooked veggies
meat fillings (cooked ground meat with herbs etc.)
Tapenade
quiche
potato with seasonings
cheese

I made a tapenade out of artichoke hearts, sundried tomatoes, pesto and parmesan cheese. I spooned a bit into each pastry cup and covered the filling with parmesan, then baked.

I also made shrimp quiche tartelettes. First I prebaked the shells for 10 minutes. Then I put one baby shrimp in each shell, then covered it with a mixture of:
1/3 cup plain yogurt
2/3 cup milk
1 egg plus 1 yolk
s&p
pinch nutmeg
1 tsp dill

Then they got baked for about 35 minutes. Delicious!

I also made a cilantro pesto to go along with both of these fillings.
Cilantro Pesto:
1/2 bunch cilantro
2 Tbsp. lemon juice
1 box frozen spinach
3 cloves garlic
1 tsp coriander
olive oil as needed

-add all ingredients but olive oil and puree. Pour olive oil in slowly, stopping often to scrape down sides of work bowl, until desired consistency is reached.

I mixed this into the cream cheese pastry, used it to moisten the tapenade, and mixed it with plain greek yogurt to pipe on top of the quiches.  You could also mix this with some plain cream cheese to make a great party dip/spread! This stuff has such great flavor!

I know that's a lot of ideas, but I'm hoping that you can find a use for this dough this holiday season! Sweet or savory, your friends will love this! Plus, they look so cute! Nobody has to know how easy these little nibblers were to make!

What is your favorite potluck party goody?


Goodnight everybody!

Monday, December 13, 2010

Incredibly Easy Marbled Halva

Well, I'm back to blogging after a busy weekend! I had a great time at our girls night gingerbread decorating party! Check out what we made!


Yup, that's a kitty manger. My friend Nora is using this kitty manger scene as a raffle item to raise money for the feral cats in our area. It turned out so cute!


I also had another craft fair on Sunday. It went pretty well, although it wasn't very busy. It sure felt Christmasy though, and I bought some fun stuff! Um, I also could have spent about as much as I made, but let's just forget about that one! ;)


Today Ben took out a huge tree on our property with his tractor, and I helped him clean up the brush. 

Then I came inside and snuggled with the dogs as I wrote our Christmas cards. I'm feeling a bit tired tonight, so I'm posting a super easy candy recipe.

Have you guys ever had halva? It's very much like fudge, but made with tahini as the base. There aren't many ingredients, but it sure tastes good! If you like tahini, that is. This was something new for me, and I'm so glad I tried it!

Marbled Halva (from the Uprisings baking book)
Makes about 2 lbs. Mix in two batches
Light:
7/8 cup dry milk
1/3 cup honey
3/4 cup tahini

Dark: 
1/2 cup dry milk
1/3 cup carob powder (I used cocoa powder)
1/3 cup honey
3/4 cup tahini

Mix each batch in it's own bowl. It comes together quickly and easily. It should form a very soft playdough type ball. 

Set one batch on top of the other and knead for a short time, until two colors are marbled together.

 Press into an 8" pan and chill overnight. 

Cut into cubes and enjoy! Store in the fridge.

I was bad and didn't take any good pictures of my finished halva. You can see it there on the left. I loved this stuff so much! I think I need to make it every year now!

That's it for tonight folks! I'll be back tomorrow with a recipe for a great savory party treat! Cream cheese dough with a couple different fillings. Perfect for any pot luck or party! Goodnight!

Saturday, December 11, 2010

Sweet Ideas

Tonight I'm going to a girls night of gingerbread cookie decorating! It's going to be SO fun! I've been making little hors d'oeuvres for us to snack on, and I'm bringing all of my fun decorating books, my piping tip set, cookie cutters and other decorating paraphernalia.

Because of all that awesomeness I'll not be posting a recipe for you guys tonight. I'll just leave you with some of the things I've been baking for the holidays. Hopefully you'll see some decorating ideas, or party treats that you can use this season!
Gingies!

Mongo gingie! He's grumpy, lost an arm!
Gingerbread christmas trees! Love how these turned out!
Some of our bakery display.

Gingerbread cupcakes with chocolate or vanilla buttercream and little gingerbread snowflakes.
Stained glass sugar cookie Christmas trees.
Linzer snowflakes. The dough has almonds, cinnamon and lemon zest. They're filled with raspberry jam, and dusted with powdered sugar! YUM!
Peppermint spritz candy canes.
Tender Eggnog sandwich cookies.
Double decker Christmas rice krispie treats.
Decadent fudgy mint brownies with a ganache topping and cocoa shortbread crust.
Mini yule log cakes. Chocolate roulade with ganache mousse!

Well, that's some of the fun stuff I've been up to! I'll be posting recipes for lots of these later on. Now, I'm off for a fun evening with the girls, plus tomorrow is the craft fair!

P.S. I've been working on some improvements for the blog. On the right at the top you can now subscribe to my RSS feed, and follow me on twitter and Facebook! If you want to get an email when a new post is up, please go to the "contact me" page and email me with you email address. So happy to have all of you along for the ride! Happy baking!

Wednesday, December 8, 2010

Quick Dinner with Red Quinoa

I realize that lately every post has been about cookies, candy or cupcakes. I admit, it could be worse! But please don't think that's all I eat! Every once in a while I'll actually cook a healthy meal, too. The people over at Alter-eco fair trade were really generous, and sent me quite a few samples a while back. I've slowly been working my way through them. I'm sort of savoring each item, not wanting to run out!

Last week I finally cracked open the bag of red quinoa. I had tried regular quinoa before, but never the red stuff. First of all, the color is just beautiful! Very festive for this time of year. I wanted to be able to taste the quinoa, not a bunch of other stuff, so I opted for a very simple pilaf.

I sauted one onion, added the dry quinoa and dry cooked it until it smelled toasty. I added the recommended amount of water, and let it cook while I prepared the rest of dinner. Good so far!

I cut up a head of broccoli, spread it on a baking sheet with olive oil, s&p, and popped it into a 400* oven. Pretty darn easy!

Finally, I set up our bamboo steamer with some water and brought it to a boil, creating lots of steam. I made a quick vinaigrette to flavor the tilapia fillets. Here's what went into a small bowl:
3 Tbsp olive oil
3 Tbsp lemon juice
2 Tbsp whole grain mustard
2 tsp honey
1 Tbsp water
1 Tbsp minced fresh thyme
s&p

If I'd had a fresh lemon I would have cut it into slices and laid them in a layer on the bottom level of the steamer. Sadly, my kitchen was bare of lemons. I set the fillets on the top of the steamer basket, spooned some vinaigrette over each one, put on the lid, and steamed them until the fish was opaque and flaky, about 7-10 minutes, depending on the thickness. That was easy too!

Just as the fish was cooking I sprinkled some grated cheese over the broccoli that was still in the oven so it would melt a bit. I also added s&p, plus a tiny bit of minced thyme to the quinoa. That dinner came together in about 45 minutes from start to finish! Maybe less!

I love the contrast of colors, and textures. It all tasted SO good! I spooned a bit more of the vinaigrette over the fish once it was served.

The quinoa kept its beautiful color through the cooking process, and the texture was amazing! It was light but almost crisp at the same time. No unpleasant hardness or weird chewiness, just toasty goodness. Everyone in our house was pleasantly surprised! I'd say the red quinoa is a but nuttier and lighter than regular quinoa. I think I like it better, too! Now I really can't wait to try the black variety!

Hope this gives you some quick and healthy dinner ideas! You're halfway to the weekend, and there are more candy posts to come! Hurray!